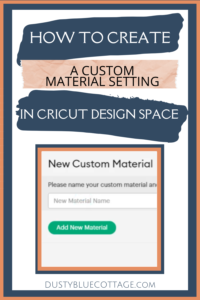
HOW TO CREATE A CUSTOM MATERIAL SETTING IN CRICUT DESIGN SPACE
Learn How To Create A Custom Material Setting In Cricut Design Space
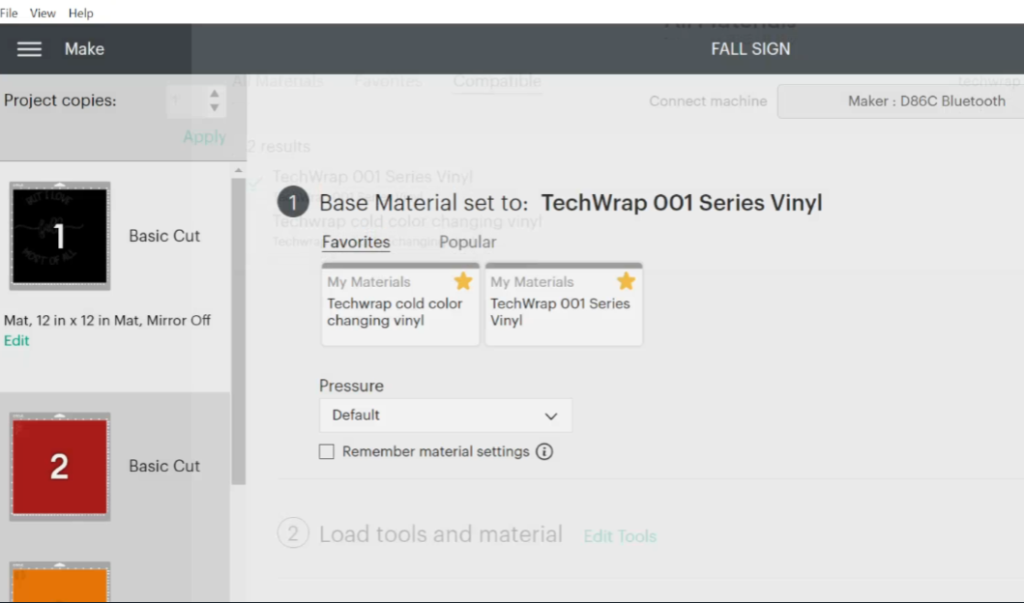
Create a custom material setting in Cricut Design Space
If you’re having problems with poorly cut materials your material setting might be to blame!
In this tutorial, I show you how to add a custom material setting in Cricut Design Space to ensure you get the best cut possible for the material you’re using!
Get perfect cuts from your Cricut Machine with Custom Pressure Settings
IF YOU PREFER VIDEO YOU CAN WATCH – How To Create A Custom Material Setting In Cricut Design Space

The key to getting great results with your Cricut is having the correct material pressure setting.
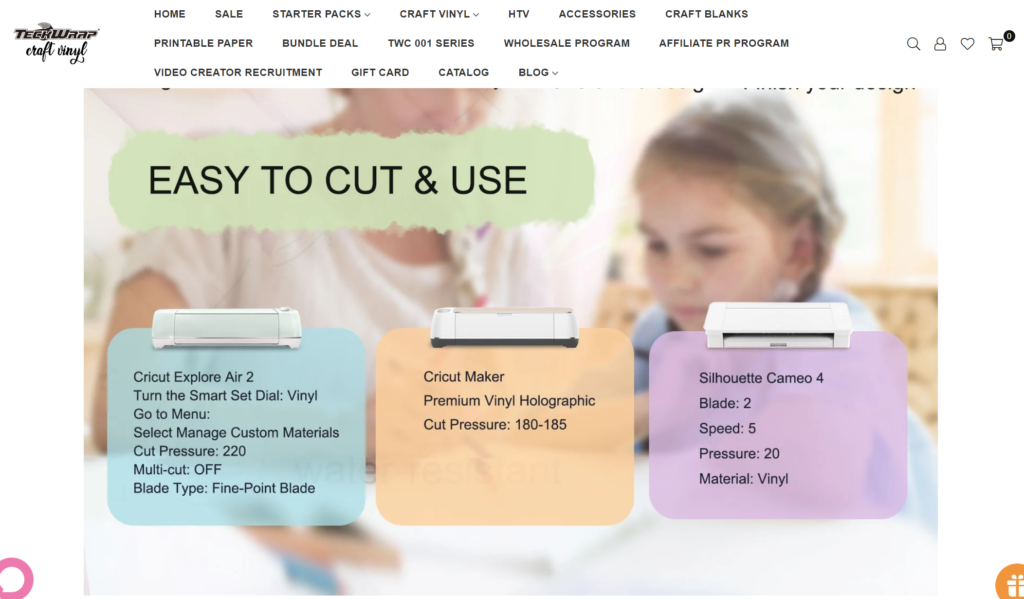
I recently received a PR package from TechWrap Craft Vinyl with quite a few rolls and sheets of their 001 M Series vinyl – which is their matte adhesive vinyl line.
Trying out new products is always fun. However, Cricut Design Space only has its branded products listed in your material settings. So, it’s important to check for the pressure setting suggested by the manufacturer and add that setting to your list of materials.
With the package of vinyl from TechWrap, I received a sheet telling their custom pressure setting recommendations according to the cutting machine you’re using.
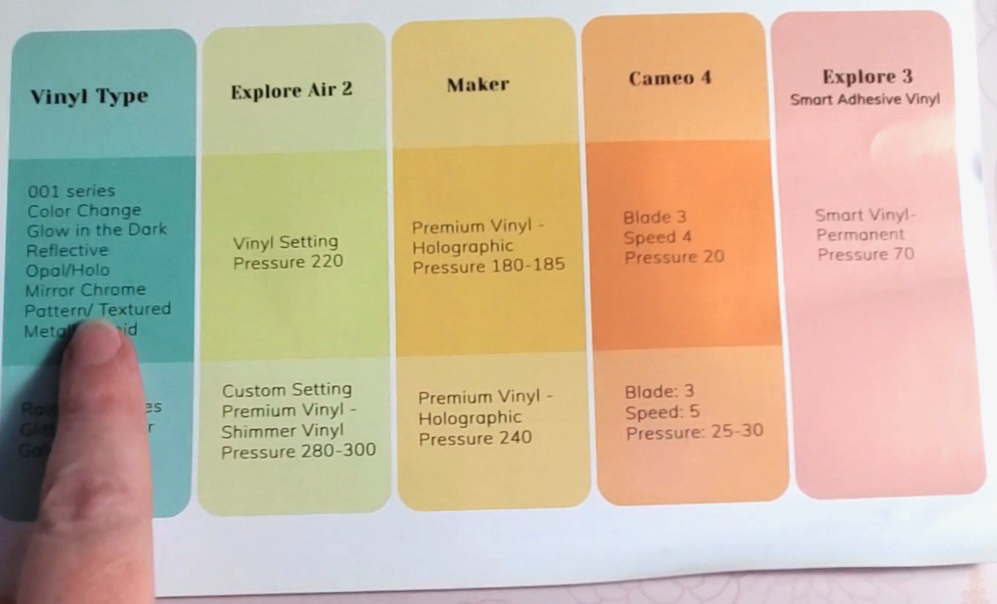
If you don’t see a setting recommendation on your material, you can often find it located on the brand’s website like you can find here, on TechWrap’s page.
Let’s Create A Custom Material Pressure Setting In Cricut Design Space And Add It To Our Favorites!
Having a custom material setting allows you to simply make one click and have the confidence you’ll be getting the best possible cuts for your Cricut project.
Step 1 – Pull up your canvas for the Design Space project you’re working on.
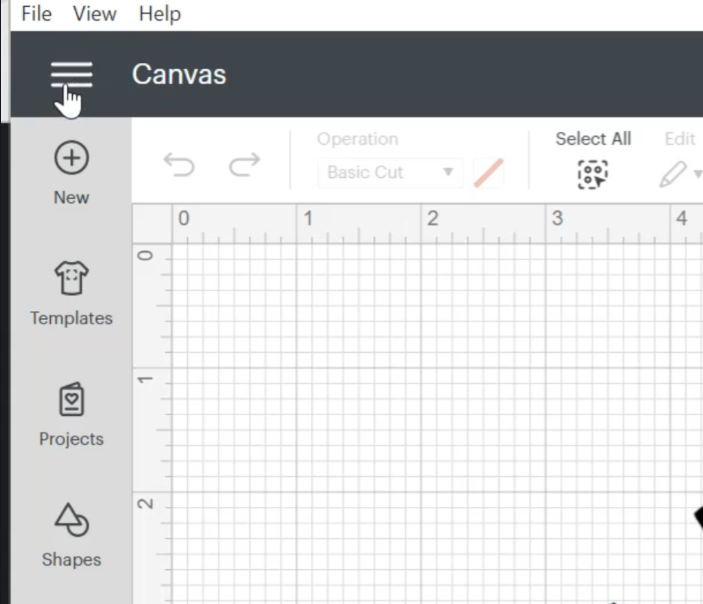
Step 2 – Click on the 3 lines (hamburger menu) in the upper left-hand corner of the screen and click on Manage Custom Materials.
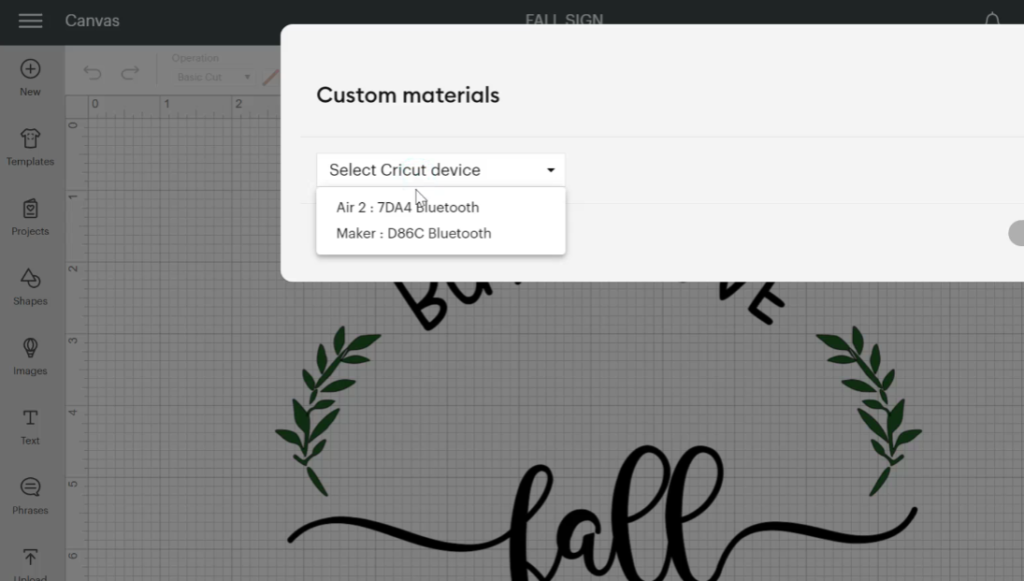
Step 3 – In the drop-down menu, select the Cricut machine you’re using.
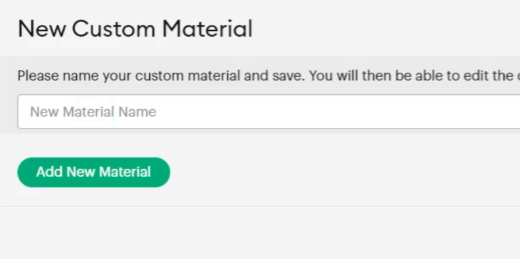
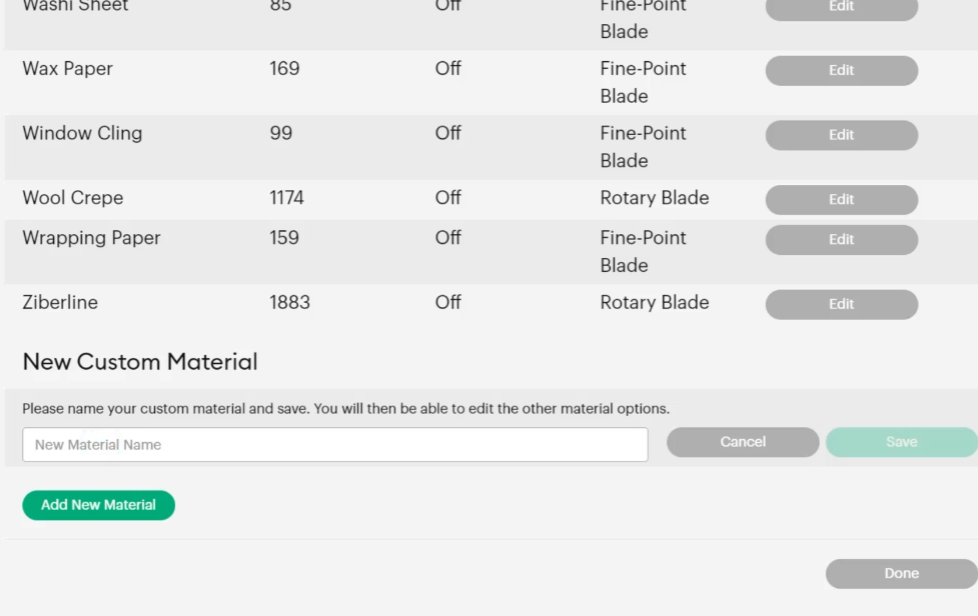
Step 4 – Scroll all the way to the bottom of the materials list and select “Add New Material.”
Step 5 – Type in the name of the new material and click “Save.”
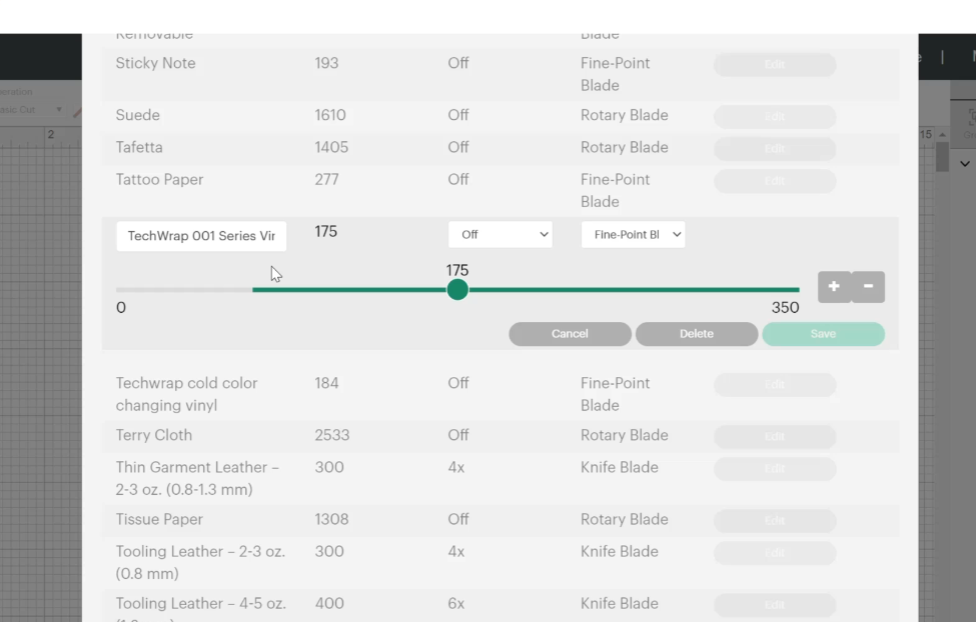
Step 6 – Find the name of the material you created in the alphabetical listing and slide the green slider to the pressure setting recommended by the manufacturer. Click “Save” then click “Done” at the bottom of the screen.
That’s all there is to it!
Next, when you go to cut your project click on “Browse All Materials.” In the search bar enter the name of your custom-created setting. Click on the STAR to add the material to your favorites!
Now, whenever you’re using that new material, you’ll be able to quickly and easily select the correct choice of cut setting and you’ll end up with amazing results!
I hope you found this tutorial helpful!
SHARING IS CARING
Please help me by sharing this tutorial on your favorite social media site or pin it on Pinterest! Doing so helps this site to continue to grow so that I can keep providing you with helpful tutorials and free content. Thank you!