CRICUT HALLOWEEN PROJECT | DIY PERSONALIZED TRICK-OR-TREAT BAGS WITH CRICUT
Cricut Halloween Project | DIY Personalized Trick-or-Treat Bags With Cricut
(Note: Some of the links provided are affiliate links. This means, at no additional cost to you, I will earn a commission if you click through and make a purchase. You can read our disclosure policy here.)
TODAY WE’RE MAKING PERSONALIZED TRICK-OR-TREAT BAGS WITH THE SVG FILES AVAILABLE IN MY SHOP.
DIY Personalized Trick-or-Treat Bags With Cricut
Today we’re making personalized Trick-or-Treat bags with the SVG files available in my shop.

Be sure to scroll through the whole tutorial because today I’m showing you an awesome tip to help you cut your designs faster by cutting different colors on the same mat. You won’t want to miss it!
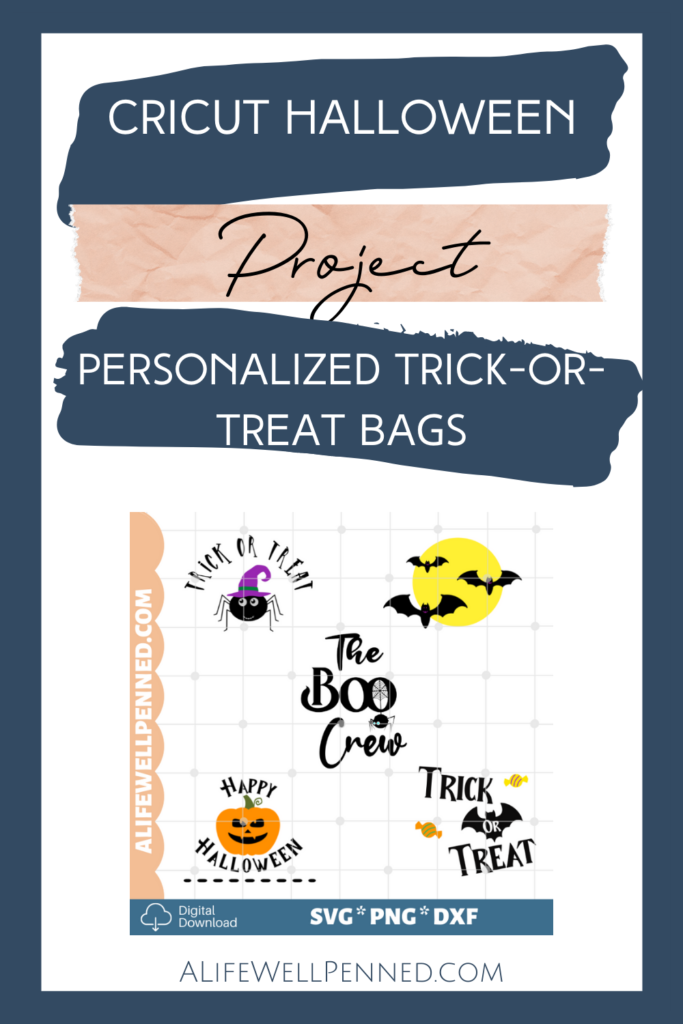
IN THIS TUTORIAL I’LL WALK YOU THROUGH MAKING ONE OF THE FIVE TRICK-OR-TREAT BAGS FROM THIS SVG BUNDLE – PLUS, I’LL SHOW YOU HOW TO CUSTOMIZE IT WITH THE NAME OF YOUR LITTLE GOBLIN
Halloween is a fun time of the year and the perfect opportunity to pull out your Cricut and whip up some fun, easy, personalized Trick-or-Treat bags, like these ones, for the little ones in your life!
IF YOU PREFER VIDEO YOU CAN WATCH THE YOUTUBE VIDEO HERE 👇
MATERIALS & SUPPLIES FOR THIS CRICUT HALLOWEEN PROJECT
Now for this project, you’ll need –
- Your Cricut Machine – these will work with your Explore or Maker.
- Standard Grip Cutting Mat
- HTV – in various colors
- Canvas bags to apply the design
- Cricut Heat Press or Household Iron
- Halloween SVG files or a design you like from Cricut Design Space as a Cricut Access subscriber
CLICK HERE TO PURCHASE AND DOWNLOAD THE SVG BUNDLE
If you need some help downloading SVG files and uploading them to Cricut Design Space? Be sure to check out my tutorial HOW TO DOWNLOAD AND USE SVG FILES IN CRICUT DESIGN SPACE.
So I’m already in Cricut Design Space and you can see that I’ve gone ahead and uploaded the 5 SVG files from this bundle.
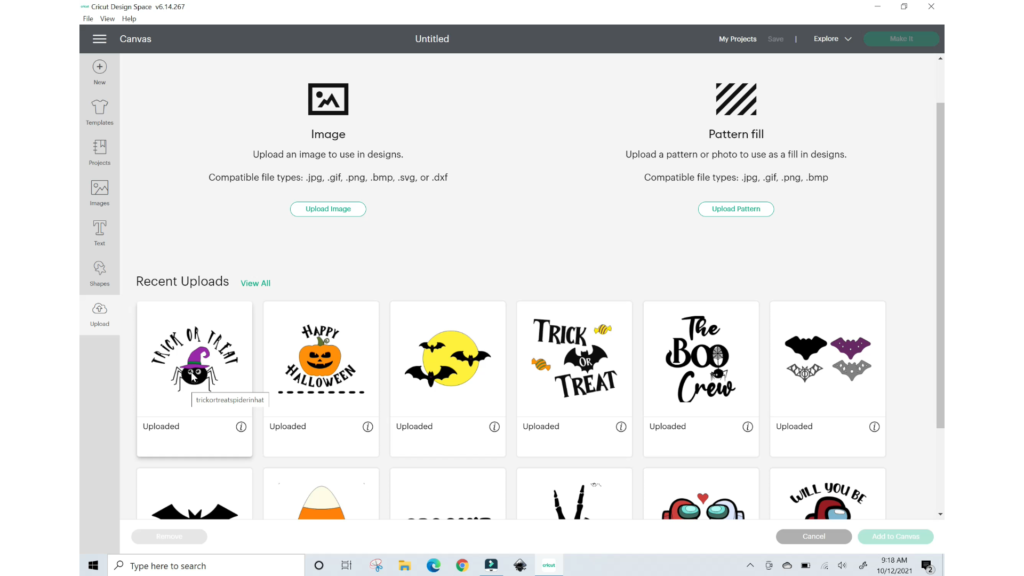
In this tutorial, we’re going to make this cute Trick-or-Treat Spider. For this design, I’ll be using HTV in black, white, green, and purple.
The eyes in the design happen to be grey so that they show up better on your canvas but remember you’re never stuck to the colors on any design you purchase – you can use any color htv you want.
We’ll click on the image and add it to our canvas.
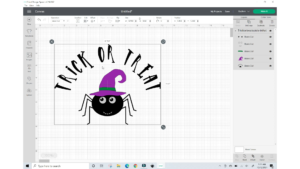
This image should load at roughly 8 ½ by 6 1/2. Be sure you measure the bag you’re using and then you can resize the image to fit your bag by clicking on the entire design and grabbing the little arrow in the corner and stretching or shrinking it to fit.
The bags I’m using are 14 by 16 so I’m going to size the design to 9 inches which will give a nice margin on the sides.
We’re also personalizing these bags today so I’ll click to add some text. I’ll type out ISABELLA – and change the font to a pretty script font I have and I’ll size it to 10 inches to make it pretty prominent. Then change the color of the font to black.
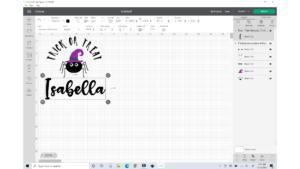
Let’s zoom out a bit now so we can see the entire project on the canvas.
We’ll leave a bit of room between the spider and our name.
Finally, we need to highlight both the text and the design and hit ALIGN and then center.
Now if we were to hit MAKE IT right now – the black for the name and the black in the spider design are not quite lined up perfectly the way I want them on the bag. You can go ahead and cut it like this and just cut across to separate the design and name into two pieces and line them up by eyeballing it. But I’m going to go back on the canvas here. And on the right sidebar, we can click ungroup. Now you can click on the text, hold down the shift key, and click on the spider and click attach. Now we have the spider and the words hooked together in the proper alignment to place on the bag.
And by the way – don’t worry that the black has come to the front on the canvas and you can no longer see the eyes – you can still see in the sidebar the other pieces are there – just sitting underneath.
One last step here that you may not have to take – I’m choosing to use glitter htv for the hat and hatband. The scraps I have happen to be Cricut brand glitter htv and layering Cricut glitter on top of each other is not recommended.
So I need to grab my hat over here and grab the hatband. Position the band on top of the hat and SLICE.
This way I can lay the green band right inside of the two purple pieces so it’s directly touching the bag and not on top of another glitter htv.
Siser has their Sparkle HTV and that is a glittery vinyl that has a smooth top finish so it can be layered on top of itself. But since my scraps are Cricut brand we have to do it this way.
Let’s get ready to cut by clicking CONTINUE and today I’m using my Explore Air 2 and I already have it set to Iron-on and we’ll go ahead and select the button to mirror all the mats since we’re using iron-on.
SO HERE’S THE PRO TIP I PROMISED YOU!
Now here’s the fun part – click over here on the green mat. Do you see these three little dots in the upper left corner?
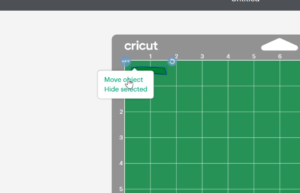
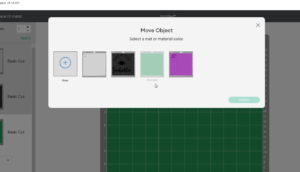
We’ll click on them and click move object. It shows you what mat it’s on currently but I’m going to click to send the object to the purple mat with the hat and hit confirm.
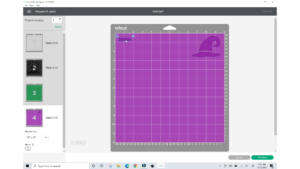
Now both items are on the same mat. Now if you were using the same type of htv for the eyes you’d be able to send them over to this mat as well. But if you’re using different types of htv you’ll need to have them on different mats. The blade will cut all the items on the same mat at the same thickness that was selected.
So now our green mat will still show on the left side but you’ll be able to see that it’s now empty.
So we’ll go to the purple mat and move the two different objects to space them out.
Now we have two scraps of htv in purple and green and I’m going to place them on the mat so that they’re lined up with where the mat shows they’re sitting.
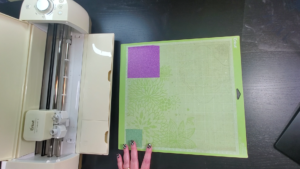
Amazing, right?! Now we can cut these 2 separate colors on one mat at the same time and not have to unload and load the mat two different times!
The next step is to iron the design onto our bag.
Cricut has a very handy Heat Press Guide you can use that will tell you the temperature and time you need for each type of vinyl.
For the everyday iron-on, I’m going to set the heat press at 315 degrees for 30 seconds. Then flip the project over and apply heat for another 15 seconds on the back of the project. Let it cool for a minute or two and then remove the carrier sheet.
Starting with the spider layer, I’ll press that into place. Once I’ve heated that for 30 seconds I’ll layer the whites of the spider’s eyes on and heat for another 30 seconds. Then the last piece of the everyday iron-on is the black of the spider’s eyes.
Remember to keep the carrier sheets handy because you have to cover all of the vinyl as you add each layer. If the htv you’ve already adhered to the project is exposed directly to the heat press it’s going to melt and make of mess of the heat press and ruin your project! So add your next layer then top it with the larger carrier sheet to protect your design.
The glitter htv needs a bit higher temperature so before I iron on the hat and hatband I’ll increase the temp on the heat press to 330 degrees for 30 seconds.
Cricut brand glitter iron-on is not able to layer on top of itself. The rough surface will only allow it to stick together for a short time and eventually it will come off. So you’ll need to be sure that you have all the glitter vinyl pieces touching the canvas and not layered on top of each other.
I hope you liked this tutorial! It was so much fun designing these SVGs.
You can also use any number of designs available to Access Members in Cricut Design Space and pair them with a name for a personalized touch!
SHARING IS CARING
Please help me by sharing this tutorial on your favorite social media site or pin it on Pinterest! Doing so helps this site to continue to grow so that I can keep providing you with helpful tutorials and free content. Thank you!