CALIBRATING YOUR CRICUT
(Note: Some of the links provided are affiliate links. This means, at no additional cost to you, I will earn a commission if you click through and make a purchase. You can read our disclosure policy here.)
LEARN HOW TO CALIBRATE YOUR CRICUT MAKER OR EXPLORE AIR 2 WITH THIS SIMPLE TUTORIAL
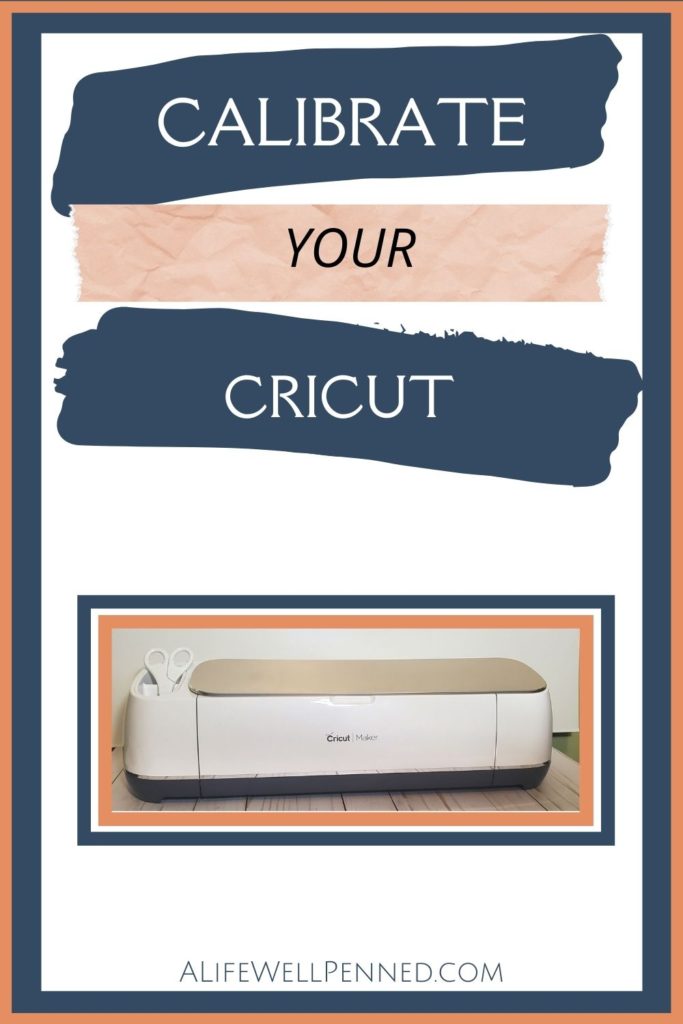
CALIBRATE YOUR CRICUT
This is an image I made using the Print Then Cut feature prior to calibrating my machine. Once we’re done with the calibration process, we’ll compare the two cut images to see the difference it makes. As you can see, there is some white space at the edge in a few spots where the machine didn’t cut exactly on the outer line of the image. This is the problem calibrating your machine will fix.


Calibrating your machine is making sure your machine cuts where it’s supposed to.
IF YOU PREFER VIDEO YOU CAN WATCH CALIBRATING YOUR CRICUT HERE
Calibrating your machine is especially important when you’re making:
- printable vinyl projects
- print then cut stickers
- any project where you send the project to the printer first and then on to the Cricut
You should only have to calibrate your Cricut once. But if you start to notice your machine isn’t cutting properly you may want to go ahead and recalibrate.
So let’s head into Design Space and I’ll walk you through the process.
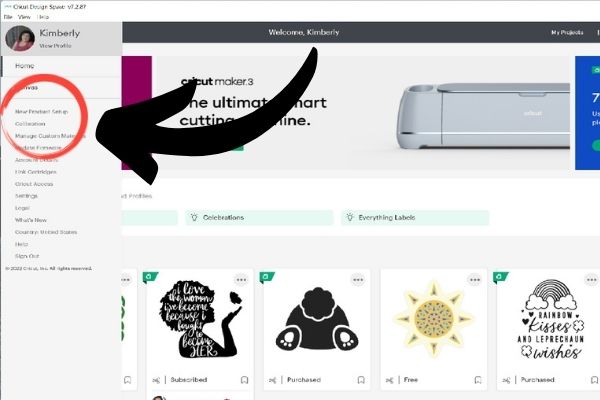
Go up to the menu button in the top left corner – those three little lines.

Once you click on it, a sidebar menu will open on the left and you’ll click on calibration.
A screen will pop up telling you what it will be calibrating. It will walk you through the whole process so that it’s as simple as can be.
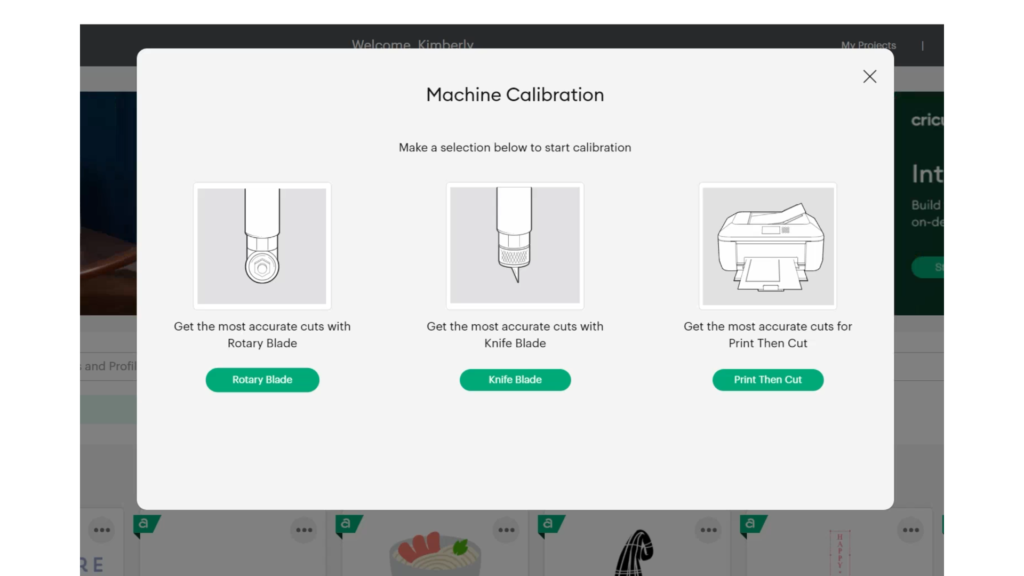
For the Maker, it will show three calibration settings. One for the rotary blade, one for the knife blade, and another for the Print Then Cut process.
For the Explore Air 2, you will only have one setting – print then cut.
Let’s click on Print Then Cut.
Another box will pop up with two steps you’ll need to follow.
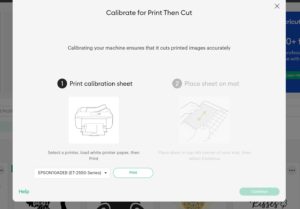
Number one is to print the calibration sheet.
Make sure the correct printer is selected then click “PRINT.”
Once your printer has printed the calibration sheet, you’ll notice a row of numbers across the top and a row of letters along the side, and a few boxes inside.
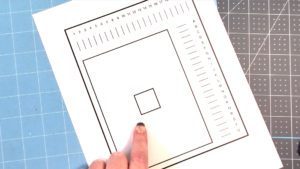
Next, you’ll place the printed sheet on your mat and lay it down, being careful to have it all the way to the edges of the mat.
Now you can select “CONTINUE” and load the mat into your Cricut by pressing the arrow button. Once it’s loaded the Cricut “GO” light will be flashing and you can go ahead and press it.
Your Cricut will go through a process where it scans the boxes – this outer box is called the registration box.
It will also cut out the smaller square in the center and you’ll notice on your computer that it’s asking for you to look, without unloading the mat, and see if the box has been cut out along the lines. I can see that it did, so I’ll go ahead and select “YES.”
Your Cricut will then proceed to cut along the lines toward the top and the side of your paper. This will fine-tune your cutting.
Again, without unloading the mat, you’ll have a box appear where you’ll be asked which line has been cut in the center the best. Select the number and letter that had been cut closest to the center of the line. Your number and letter may be different than mine.
Then click “CONTINUE.”
Now the machine will do what it calls a confirmation cut. It will cut along the larger of the boxes on your sheet inside the registration box.
Now you’ll be instructed to remove your mat from the machine and look at the confirmation cut to see how close it has cut to the line. If you’re happy with the cut you’re all done.
If you’ve found it has cut properly you will just go through this calibration process again.
Now if you were calibrating an Explore Air 2 you’re all done.
CALIBRATING THE KNIFE BLADE FOR THE CRICUT MAKER
If you’re calibrating a Maker you’ll move on to the knife blade calibration.
Now we’ll go back to the top menu again and click “CALIBRATION.”
We need to be sure the knife blade is in clamp B and place a plain piece of printer paper in the top left corner of our mat and press “CONTINUE.”
Now we’re asked to select which group of lines overlap to where it looks like one single cut line.
So, for the knife blade, we can unload the mat and take a look at it. You’ll count down from the top to select the number that overlaps the best and then click “CONTINUE.”
The next box says we’ve completed the calibration and to click the link to ensure the best performance of your knife blade and that just takes you to a page of tips and tricks to extend the life of your blade.
CALIBRATING THE ROTARY BLADE OF THE CRICUT MAKER
Finally, we’ll calibrate the rotary blade.
We’ll go back to the top menu and select calibration and choose the rotary blade.
We’re instructed to have the blade in clamp B and place a sheet of printer paper in the top left corner of the mat and select “CONTINUE.”
Like with the knife blade, we’re prompted to select the number of the line, counting down from the top, that has the cut line overlapping the best.
Number 3 is the closest for me so I’ll select it in the drop-down menu and hit “CONTINUE.”
Our calibration is complete!
Did you enjoy this tutorial? What other questions do you have about calibration?
SHARING IS CARING
Please help me by sharing this tutorial on your favorite social media site or pin it on Pinterest! Doing so helps this site to continue to grow so that I can keep providing you with helpful tutorials and free content. Thank you!